HYPRODUCTION
For this project, we are required to
-
Apply materials to the model in 3Dsmax
-
Choose one interior and exterior views
-
Render the views
-
Photoshop the views

This is how my model looks like when I first import my Revit model into the 3dsMAX.
I started with applying the materials to the exterior floor and wall
and then I tried to render for the first time

FIRST RENDER
Work in Progress
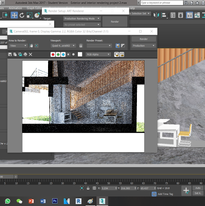
I had also screenshotted some of the process while I'm applying the materials
after finishing the exterior.
only by then I realised the Revit families we made is nice to go without applying any materials to it.
I also tried to render some part in the process to check how it will looks like
-
Concrete
-
Timber wood
-
Maple wood
-
Glass
-
Black Aluminium
-
Ceramic tile
-
Swimming pool ceramic tile
-
Damp proof Black steel
M
A
T
E
R
I
A
L
S
ETC

SECOND RENDER


FINAL
RENDERING
Exterior
Interior
After this, I finally understand its not easy and take time to process the rendering works.
PHOTOSHOP !
After finish the rendering,
I moved to the photoshop part
and this is really challenging for me as it was my first time using photoshop and need to finish it in a short time.

I started from searching for suitable sky and field for my house
I tried a few sky and end up decided to have this as my background as my house have 3 balcony which serve as a best observation spot so I decided it to be on a hill to enjoy the view from top.
1

And after that I added a few human figure in and to see where is it suitable to be place at.
2

I cut out the human using the magnetic lasso tools and also the polygon lasso tool
its fun and I love the cutting out process
3


This is how it
looks like after cutting out!
I made some re-arrangement of the position of the human figure.

4
Then I continue to work on the landscape starting from the stone pathway .
then only I add the bushes and trees


Creating Shadow
5
-
I duplicate a layer of the object that I want to create shadow.
-
Then I adjust the duplicated layer brightness and contrast to make it black.
-
Then I adjust the shadow layer using Distort function (under edit).
-
Lastly I set the opacity to the suitable shadow darkness.

6
Due to the grass slab that I rendered from 3DsMAX are not suitable for the editing,
so I need to cut off the grass and it affected the glass layer of the house.

Then I use another field background for the editing
*but still changed another background at the almost end of the editing because I found another one which I feel more suitable and related to exterior editing*
7

Add in human figure
and arrange the position
8
9
And I trying to fix the glass window by create a new layer and make the shape of the window using lasso tool and fill it with colour
(White colour + Black colour)
both with low opacity
overlay on each other to create the effect of transparency of glass.
I also added a little blue with low opacity to make it more clear
*I also get a glass reflection png to make it looks more realistic

10
I added the bushes,
changed the background
I also created some house shadow on the grass field so the things won't looks like floating


FINAL
TOUCH UP
After I confirm all the position and I started to touch up on the details such as shadow for both exterior and interior
for example, I noticed that the leg of the guy is underneath the glass table so I duplicate another layer and cut the leg and lower the opacity to make it seems like underneath the glass table.
FINAL OUTCOME

The Exterior


